Account
APPLICABLE ONLY for MARKETPLACES - C2C/P2P
API Reference | Visit SuperAdmin
When a user register in the app, he will be optionally able to create accounts based on his purpose of joining the platform.
- For a retail product marketplace like Etsy/AliExpress, Accounts are Stores Profiles.
- For an educational marketplace like Coursera, Udemy, Accounts are Tutor Profiles
- For a property marketplace platform like Airbnb, it is called as Tenant Profile. We call them generally as accounts, and it may vary based on your business model.
##Video: Configuring Accounts
Account Attributes
Account Attributes in SuperAdmin
You can create additional attributes(fields) of information to be collected when user open an account. Example such as
- Fashion Marketplace can have location, What type of products they sell, etc
- EduTech marketplace can have Tutor availability, Expertise, Academic qualifications, etc
- Grocery Marketplace can have Shop Location, Type of product they sell, Growing method(Organic), Procurement(homemade or Direct farm buy or resell)
Flexible Account creation
As a platform owner, you can design different account creation form based on the type of accounts you have.
- When you are building a hybrid marketplace, you want to have different stakeholders to open accounts. And the accounts perhaps need different information than the primary information.
- By Default, we only collect the Name and Description of the account registration
- You can configure additional attributes
- You can create multiple categories of accounts
- You can create additional attributes specific to an account category rather than overall
Accounts (Users/Profiles)
This is visible only in production/live SuperAdmin panel.
Account Category
 After onboarding users with simple signup, you might want to allow them to have personalised account opening. Accounts can be called in different way based on business model.
So, you can have multiple account types based on user persona. You will see, through account attribute values, how this can useful having categories. To activate that, you need to set up account categories.
:::important By default, account creations fields are only image, Name, Descriptions. All other fields created via attributes. :::
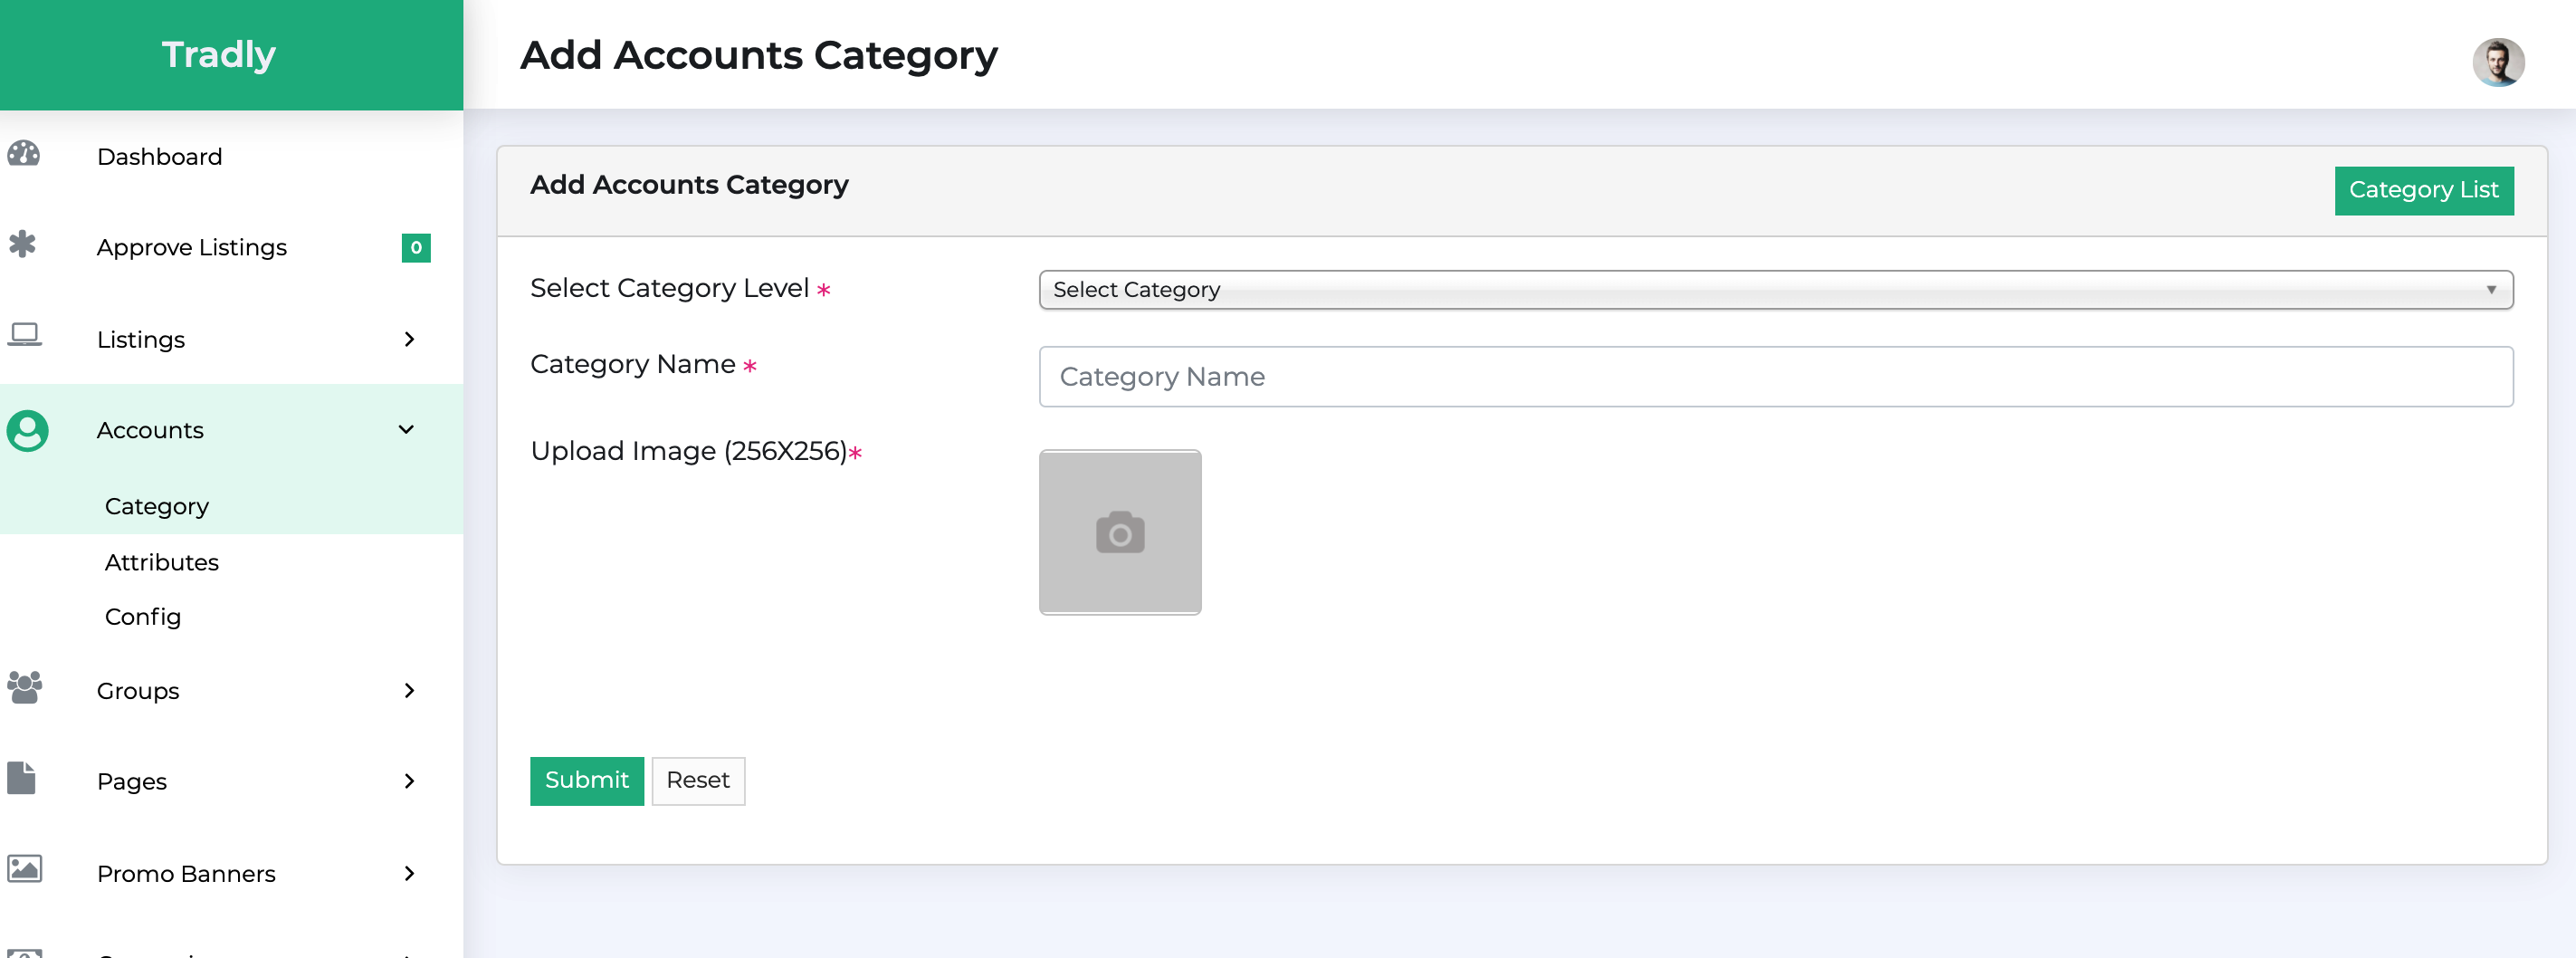
##Creating Account Category API Reference

- It is simple as listing categories in all technicalities
- Select the category (Default: Parent)
- Enter category name
- Select the icon as per the dimension (square).
- Submit
To test: You can go to app > signup up as a new user > Then, before submitting listing or open shop/account, you will be able to find the category.
Approve Accounts
To be on control with the quality/business logics of your platform is “Approval” feature. You can approve or disapprove. When you activate that feature, end business accounts may not be able to add listings until you approve them.
- Under the accounts list, you can find the all the accounts and their account status
- You can approve or disapprove accounts based on your compliance and other legal procedures.
Few example use cases:
You may want to verify whether an account is legit to avoid spam listings. Or even reject an account when there is an issue with the platform’s users.
You may want to do business verification like company details or bank verification internally, you can collect private informations on account level and then verify this informations before approving.
##Creating Account Attributes
 So now you have created categories as per your plan. You can configure different fields(Attributes) that need to be in account creation page apart from default config.
In the image,
- Categories: You can find the 4 attributes as an example. And how they are configured only for specific category types. (Shop Govt registration no only for Govt. Registered shop category)
- Operation Days Attribute: Operation days can have multiple values. That’s why you can see + sign to add values.
- Attributes: A. shop registrations — mostly one number AND B. WhatsApp one number is sufficient. Both of them as they don’t have multiple values, they do not have option to ADD VALUES. We will see how they are configured on the next step.
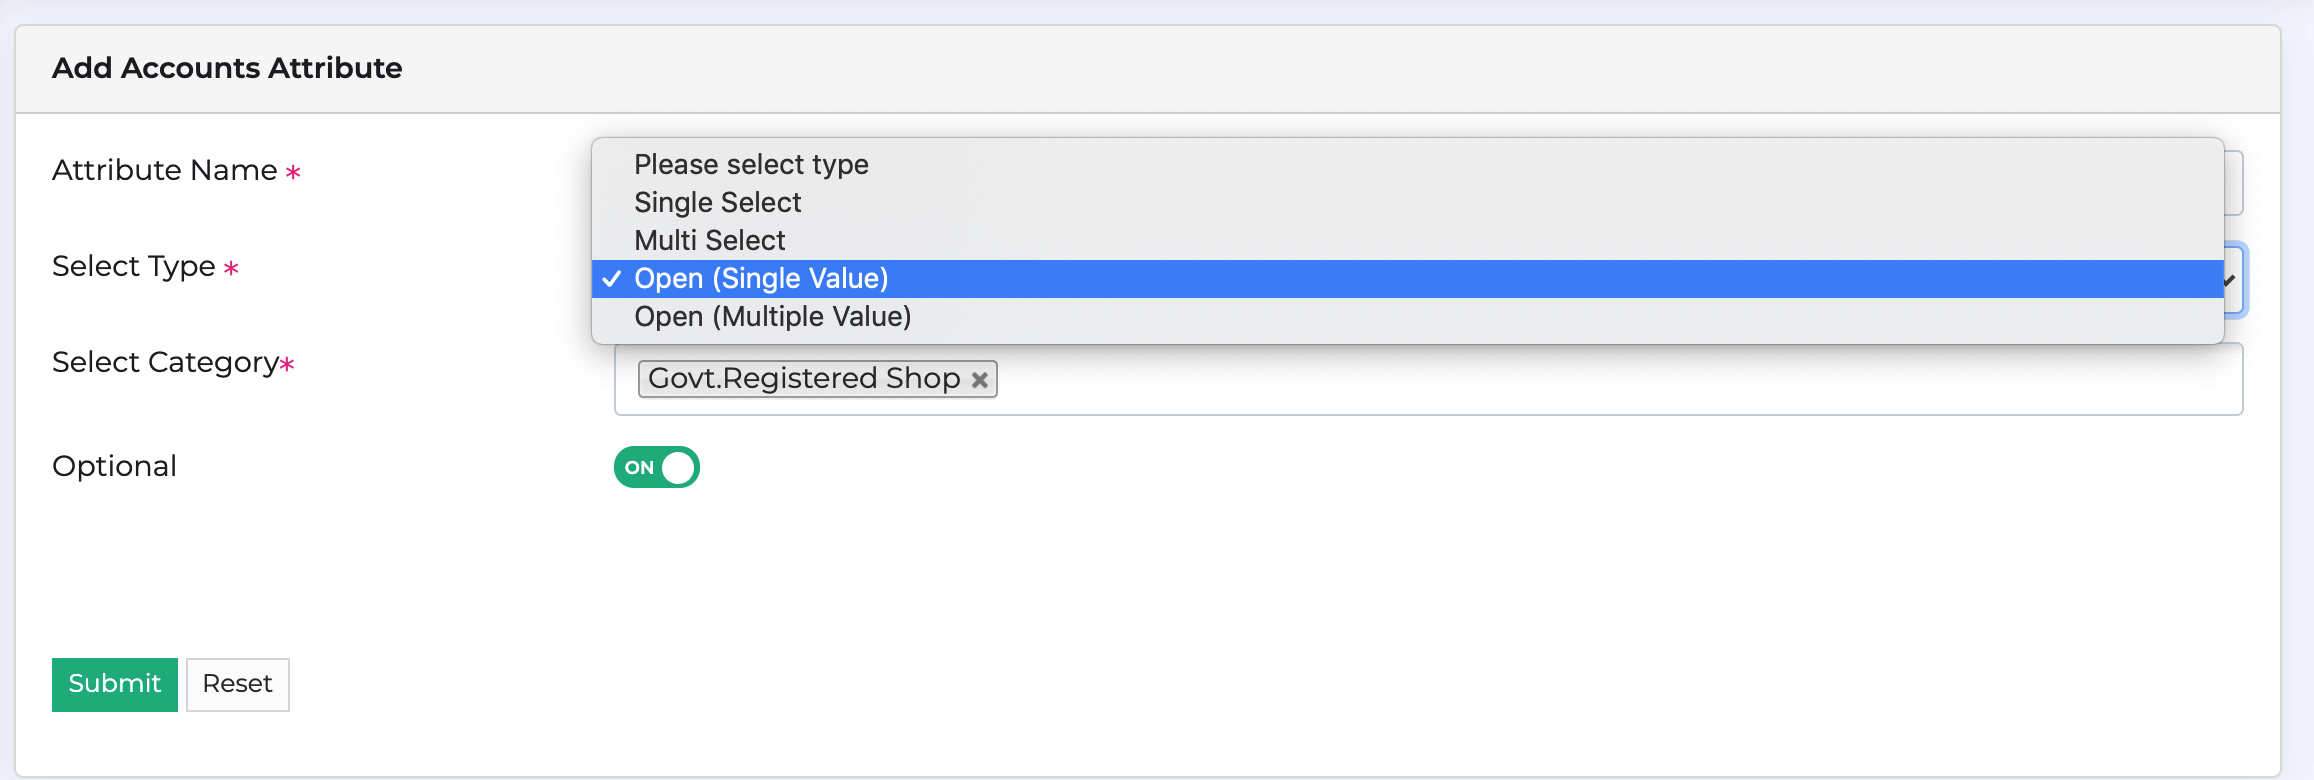
 Accounts > Attributes > Add Attributes.
- These steps lead you to create attributes as shown in the image.
- Currently, it shows how the “Shop Govt Registration No” has been created.
- You can make the attributes (fields to be entered) as optional or mandatory as well.
- And this attribute has been configured only for “Govt.Registered Shop.”
 So, when you create attributes, you must need to select the type of attributes. Currently, we have 4 types of attributes and others will be released progressively.
| Field Type | Example | Value |
|---|---|---|
| Single Select | Gender | - Male OR Female |
| Multi Select | Available sizes | S, M, L, XXL |
| Single Value | Phone number | +60123456789 |
| Multi Value | Sizes | 32,34,36 |
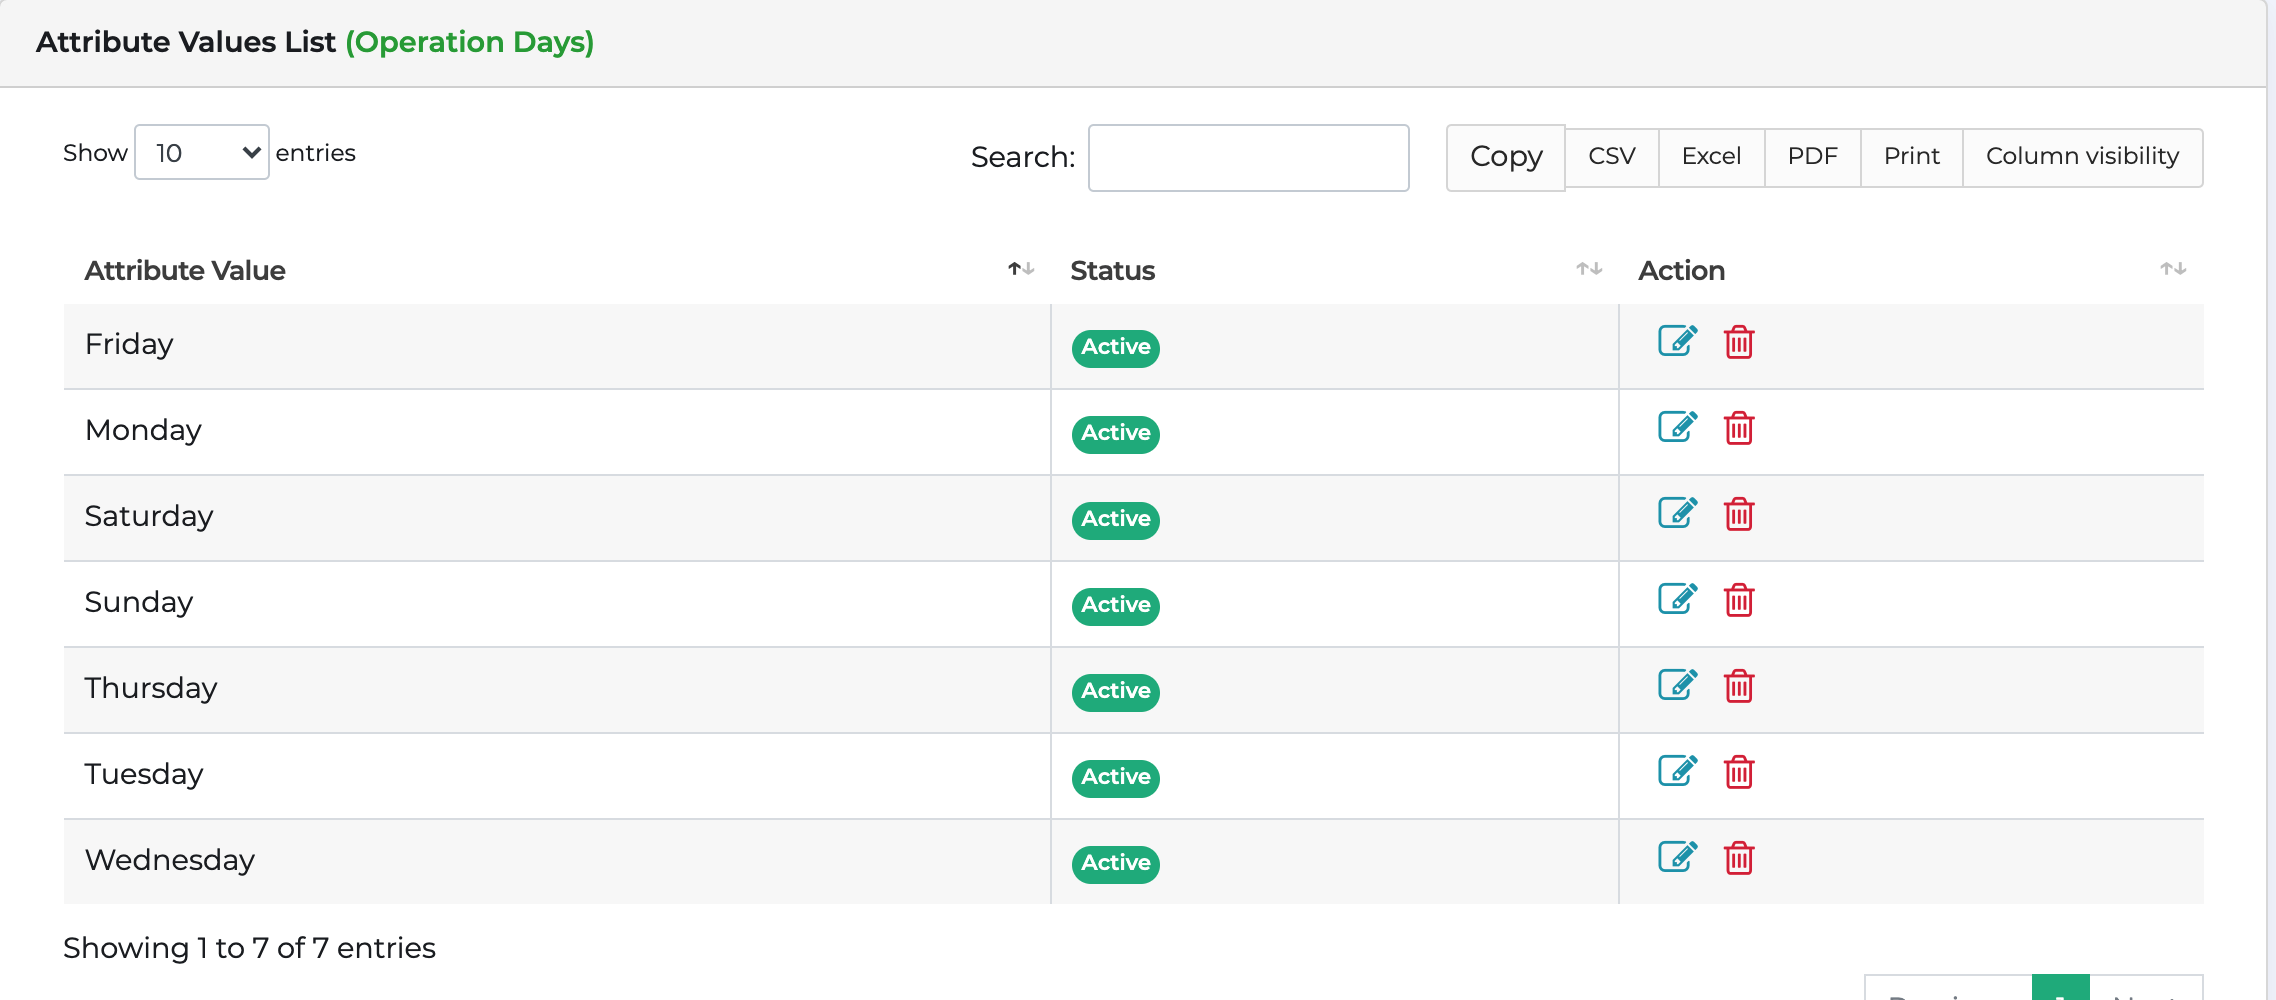
##Adding attribute values

In the “Operation Days” Attribute values which is a multi value, you can find 7days we have added there. It can be used creatively in many ways.
##Auto approval having issues Q: I have enabled auto-account approval and listing approval, but the items are not approved yet
- For existing accounts, the configuration will not approve by itself. It needs to approve manually first and then auto-approve.